 百木园
百木园【V1.1】基于树莓派的OpenCV-Python摄像头人脸追踪系统(更新系统、含演示视频)
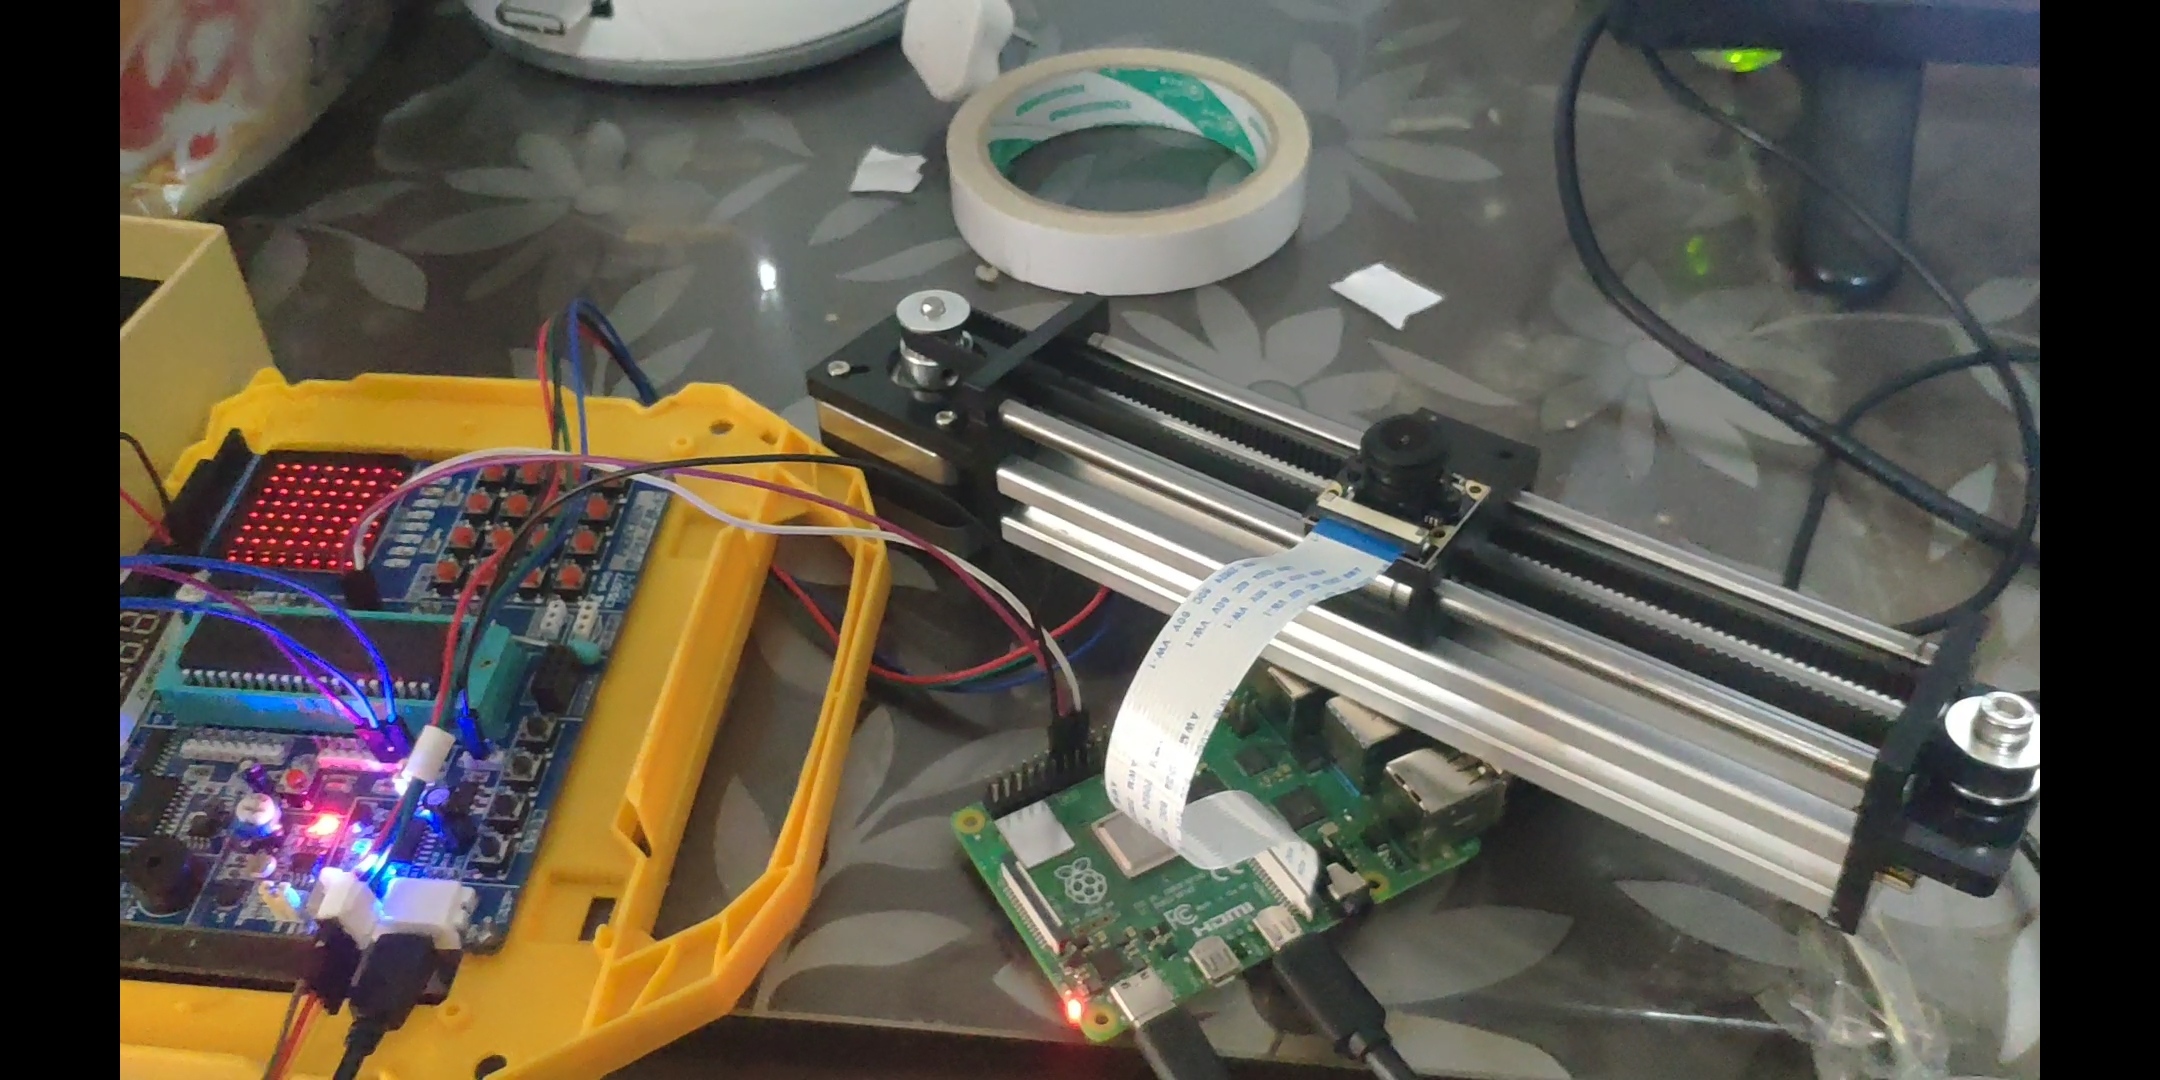
该系统目前结合了树莓派+51单片机
树莓派主要用于运行Python程序 追踪人脸 同时用GPIO口给出信号
单片机用于控制42步进电机导轨左右移动
资源:
视频:
先前的文章:
https://blog.csdn.net/weixin_53403301/article/details/122898050
人脸追踪部分:
https://blog.csdn.net/weixin_53403301/article/details/120497427
单片机控制42步进电机导轨部分:
https://blog.csdn.net/weixin_53403301/article/details/122658780
代码如下:
import cv2
import threading
import RPi.GPIO as GPIO
# import time

GPIO.setwarnings(False)
GPIO.setmode(GPIO.BCM)
GPIO.setup(23, GPIO.OUT)
GPIO.setup(24, GPIO.OUT)
GPIO.output(23, GPIO.HIGH)
GPIO.output(24, GPIO.HIGH)

cap = cv2.VideoCapture(0)  # 开启摄像头
classifier = cv2.CascadeClassifier(\'haarcascade_frontalface_alt2.xml\')

ok, faceImg = cap.read()  # 读取摄像头图像
if ok is False:
    print(\'无法读取到摄像头!\')
high=faceImg.shape[0]
width=faceImg.shape[1]
left_point = width/2+25
right_point = width/2-25
gray = cv2.cvtColor(faceImg,cv2.COLOR_BGR2GRAY)
faceRects = classifier.detectMultiScale(gray,scaleFactor=1.2,minNeighbors=3,minSize=(32, 32))
close=0
def LEFT():
    GPIO.output(23, GPIO.LOW)
    GPIO.output(24, GPIO.HIGH)

def RIGHT():
    GPIO.output(23, GPIO.HIGH)
    GPIO.output(24, GPIO.LOW)

def STOP():
    GPIO.output(23, GPIO.HIGH)
    GPIO.output(24, GPIO.HIGH)

def track():
    while close==0:
        gray = cv2.cvtColor(faceImg,cv2.COLOR_BGR2GRAY)
        faceRects = classifier.detectMultiScale(gray,scaleFactor=1.2,minNeighbors=3,minSize=(32, 32))
        if len(faceRects):
            x,y,w,h = faceRects[0]
            # 框选出人脸   最后一个参数2是框线宽度
    #         cv2.rectangle(faceImg,(x, y), (x + w, y + h), (0,255,0), 2)
            central_point = x+w/2
            if central_point > left_point:
                LEFT()
                print(\"Left\")
            elif central_point < right_point:
                RIGHT()
                print(\"Right\")
            else:
                STOP()
                print(\"Central\")
    STOP()
    print(\"Stop\")

thread1 = threading.Thread(target=track)
thread1.start()

# 循环读取图像
while True:
    faceImg = cap.read()[1]  # 读取摄像头图像
    cv2.imshow(\"faceImg\",cv2.flip(faceImg,1))
    if cv2.waitKey(10) == 27:   # 通过esc键退出摄像
        break

# 关闭摄像头
cap.release()
cv2.destroyAllWindows()
close=1
STOP()
print(\"Stop\")
来源:https://blog.csdn.net/weixin_53403301/article/details/123252275
本站部分图文来源于网络,如有侵权请联系删除。