 百木园
百木园anaconda
需要在anaconda 环境下进行安装,推荐使用。
- 官网:https://www.anaconda.com/
- 用法:https://www.cnblogs.com/yunhgu/p/15498134.html
安装rosbag
进入anaconda环境下,运行如下命令,可能会报超时错误,跟你网络有关系。需要你修改hosts来访问github。
pip install --extra-index-url https://rospypi.github.io/simple/ rosbag
pip install roslz4 --extra-index-url https://rospypi.github.io/simple/
安装成功后,测试

安装cv_brigde
cv_bridge下载(源代码https://github.com/ros-perception/vision_opencv):https://codeload.github.com/ros-perception/vision_opencv/zip/refs/heads/noetic
下载完成后cd至cv_bridge文件夹,然后cmd打开命令行窗口:
python setup.py install
安装成功后测试

whl包
https://files.cnblogs.com/files/yunhgu/rosbag_cv_bridge.zip
安装sensor_msgs
这个比较简单直接使用pip就可以了
pip install sensor_msgs --extra-index-url https://rospypi.github.io/simple/
问题
实际使用过程中遇到了一个问题,在解析图片信息的时候
from cv_bridge.boost.cv_bridge_boost import cvtColor2
上面这个导入报了错
No module named \'cv_bridge.boost\'
解决方法:
下载这个
https://github.com/rospypi/simple/raw/any/cv-bridge/cv_bridge-1.13.0.post0-py2.py3-none-any.whl
然后进入anconda界面
pip install cv_bridge-1.13.0.post0-py2.py3-none-any.whl
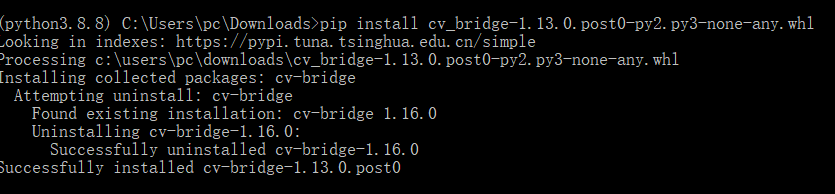
从信息得出可能是版本的问题。
python3 代码解析bag文件
# -*- coding: utf-8 -*-#
# -------------------------------------------------------------------------------
# Name: parse_bag
# Author: yunhgu
# Date: 2022/1/10 11:01
# Description:
# -------------------------------------------------------------------------------
import copy
import struct
from pathlib import Path
from traceback import format_exc
import cv2
import numpy as np
import rosbag
import sensor_msgs.point_cloud2 as pc2
from cv_bridge import CvBridge
PCD_ASCII_TEMPLATE = \"\"\"VERSION 0.7
FIELDS x y z intensity
SIZE 4 4 4 2
TYPE F F F U
COUNT 1 1 1 1
WIDTH {}
HEIGHT 1
VIEWPOINT 0 0 0 1 0 0 0
POINTS {}
DATA ascii
\"\"\"
PCD_BINARY_TEMPLATE = \"\"\"VERSION 0.7
FIELDS x y z intensity
SIZE 4 4 4 4
TYPE F F F F
COUNT 1 1 1 1
WIDTH {}
HEIGHT 1
VIEWPOINT 0 0 0 1 0 0 0
POINTS {}
DATA binary
\"\"\"
class BagExtractor:
def __init__(self, bag_folder, dst_folder):
self.bag_folder = Path(bag_folder)
self.dst_folder = Path(dst_folder)
self.bridge = CvBridge()
def extract_pcd_img(self, pcd_topic_list: list, img_topic_list: list):
\"\"\"
:param pcd_topic_list: 点云文件topic名字列表
:param img_topic_list: 图片文件topic名字列表
:return:
\"\"\"
for bag_file in self.bag_folder.rglob(\"*.bag\"):
output_file = self.dst_folder.joinpath(bag_file.relative_to(self.bag_folder))
output_folder = output_file.parent.joinpath(f\"{output_file.stem}\")
output_folder.mkdir(parents=True, exist_ok=True)
with rosbag.Bag(bag_file, \'r\') as bag:
info = bag.get_type_and_topic_info()
print(info.topics)
pcd_number = self.get_pcd_img_number(info, pcd_topic_list)
img_number = self.get_pcd_img_number(info, img_topic_list)
print(f\"解析{bag_file.name} pcd总数:{pcd_number} 图片总数:{img_number}\")
for topic, msg, t in bag.read_messages():
time_str = \"%.9f\" % msg.header.stamp.to_sec()
if topic in pcd_topic_list: # 点云的topic
pcd_path = output_folder.joinpath(f\"{time_str}.pcd\")
# self.to_pcd_ascii(pcd_path, msg)
self.to_pcd_binary(pcd_path, msg)
print(f\"Extract pcd file {time_str}.pcd\")
if topic in img_topic_list: # 图片的topic
img_path = output_folder.joinpath(f\"{time_str}.png\")
self.to_img(img_path, msg)
print(f\"Extract img file {time_str}.png\")
@classmethod
def get_pcd_img_number(cls, info, topic_list):
try:
for topic in topic_list:
topic_ob = info.topics.get(topic, None)
if topic_ob:
return topic_ob.message_count
return 0
except Exception as e:
print(f\"获取pcd|img帧数出错:{e}\")
return 0
@classmethod
def to_pcd_ascii(cls, pcd_path, msg):
with open(pcd_path, \'w\') as f:
points_data = np.array(list(pc2.read_points(msg)))
lidar = list(np.delete(points_data, np.where(np.isnan(points_data))[0], axis=0))
header = copy.deepcopy(PCD_ASCII_TEMPLATE).format(len(lidar), len(lidar))
f.write(header)
for pi in lidar:
f.write(\' \'.join([str(i) for i in pi]) + \'\\n\')
@classmethod
def to_pcd_binary(cls, pcd_path, msg):
with open(pcd_path, \'wb\') as f:
points_data = np.array(list(pc2.read_points(msg)))
lidar = list(np.delete(points_data, np.where(np.isnan(points_data))[0], axis=0))
header = copy.deepcopy(PCD_BINARY_TEMPLATE).format(len(lidar), len(lidar))
f.write(header.encode())
for pi in lidar:
h = struct.pack(\'ffff\', pi[0], pi[1], pi[2], pi[3])
f.write(h)
def to_img(self, img_path, msg):
try:
# cv_image = self.bridge.compressed_imgmsg_to_cv2(msg)
cv_image = self.bridge.imgmsg_to_cv2(msg)
cv2.imencode(\'.png\', cv_image)[1].tofile(str(img_path))
except Exception as e:
print(f\"生成图片失败:{e}\")
if __name__ == \'__main__\':
try:
bag_path = r\'C:\\Users\\pc\\Desktop\\bag测试数据\\data\' # bag文件路径
dst_path = r\'C:\\Users\\pc\\Desktop\\bag测试数据\\result\' # 结果路径
extractor = BagExtractor(bag_path, dst_path)
extractor.extract_pcd_img(pcd_topic_list=[\'/rslidar_points\', \'/zvision_lidar_points\'],
img_topic_list=[\'/usb_cam/image_raw\', \'/zed2/zed_node/left/image_rect_color\'])
except Exception as ee:
print(f\"运行失败,无法解决请连续开发人员!{format_exc()}{ee}\")
rospy 路径
https://rospypi.github.io/simple
来源:https://www.cnblogs.com/yunhgu/p/15785460.html
图文来源于网络,如有侵权请联系删除。