 百木园
百木园内容概要
- token认证小练习
- 认证
- 权限
- 频率
内容详细
登录携带token认证小练习
models.py:
class User(models.Model):
    username = models.CharField(max_length=32)
    password = models.CharField(max_length=32)


class UserToken(models.Model):
    user = models.OneToOneField(to=\'User\', on_delete=models.CASCADE)
    token = models.CharField(max_length=64)
views.py:
from rest_framework.response import Response
from rest_framework.viewsets import ModelViewSet
import uuid

class BookViewSet(ModelViewSet):
    queryset = Book.objects
    serializer_class = BookModelSerializer

    @action(methods=[\'GET\', \'POST\'], detail=False)
    def login(self, request):
        username = request.data.get(\'username\')
        password = request.data.get(\'password\')
        user = models.User.objects.filter(username=username, password=password).first()
        if user:
            token = str(uuid.uuid4())
            models.UserToken.objects.update_or_create(user=user, defaults={\'token\': token})
            return Response({\'code\': 100, \'msg\': \'登录成功\', \'token\': token})
        return Response({\'code\': 101, \'msg\': \'用户名或密码错误\'})
urls.py:
from rest_framework.routers import DefaultRouter, SimpleRouter

router = DefaultRouter()
router.register(\'books4\', views.BookViewSet)

urlpatterns = [
    path(\'admin/\', admin.site.urls),
]
urlpatterns += router.urls
开始学习之前,先搞清楚 drf 认证、权限、频率三大功能是在哪里实现的?
在 APIView 源码中实现,所有继承 APIView 的类都可以实现三大认证
APIView 的类的 as_view 返回 view 函数的内存地址,view运行后调用了 APIView中的 dispatch方法,三大认证在 self.initial(request, *args, **kwargs) 函数中调用
    def dispatch(self, request, *args, **kwargs):
        request = self.initialize_request(request, *args, **kwargs)
        try:
            self.initial(request, *args, **kwargs)
        except Exception as exc:
            response = self.handle_exception(exc)
APIView --> initial
    def initial(self, request, *args, **kwargs):
        self.perform_authentication(request)  # 认证
        self.check_permissions(request)  # 权限
        self.check_throttles(request)  # 频率
认证源码
APIView-->perform_authentication(request)
源码中只返回了登录用户或者匿名用户对象
该方法调用了 request.user ,也就是重写后的 request 属性中的 user,我们知道那里的 user有被调用触发的方法 和 被赋值触发的方法
    def perform_authentication(self, request):
        \"\"\"
        `request.user` or `request.auth` is accessed.
        \"\"\"
        request.user
转到重写 request 对象的Request类中:
Request-->user(property)
可以看到调用的是 Request类中的 _authenticate()
    @property
    def user(self):
        if not hasattr(self, \'_user\'):
            with wrap_attributeerrors():
                self._authenticate()
        return self._user
Request-->_authenticate核心代码
该方法循环 Request类中的 authenticators列表(认证类列表)
调用认证类 authenticator 中的 authenticate(self) 方法,并放回元组user_auth_tuple,包含登录用户对象(user)和 auth
如果 user_auth_tuple 不为 None,则 request 对象便获取了user对象和 auth对象
- 我们在自定义认证类时,就要重写
authenticate(self)方法,并放回user对象和auth对象
    def _authenticate(self):
        for authenticator in self.authenticators:
            try:
                user_auth_tuple = authenticator.authenticate(self)  # 调用类中的authenticate方法
            except exceptions.APIException:
                self._not_authenticated()
                raise

            if user_auth_tuple is not None:
                self._authenticator = authenticator
                self.user, self.auth = user_auth_tuple
                return
        self._not_authenticated()
authenticators 怎么来的?
可以看出,authenticators 是 Request类实例化时传进来的参数,那么我们就得回到APIView类中的 initialize_request(self, request, *args, **kwargs) 方法,因为是在那里实例化了 Request类
class Request:
    def __init__(self, request, parsers=None, authenticators=None,
                 negotiator=None, parser_context=None):
        self.authenticators = authenticators or ()
APIView-->initialize_request
可以看到调用了自己的 get_authenticators() 方法
    def initialize_request(self, request, *args, **kwargs):
        return Request(
            request,
            parsers=self.get_parsers(),
            authenticators=self.get_authenticators(),
            negotiator=self.get_content_negotiator(),
            parser_context=parser_context
        )
APIView-->get_authenticators()
这是个列表生成式,从视图函数类中的认证类列表 authentication_classes 中取出一个个认证类加括号实例化为对象,并存在类表中放回,那么get_authenticators() 方法放回的是一个认证类对象的列表
    def get_authenticators(self):
        \"\"\"
        Instantiates and returns the list of authenticators that this view can use.
        \"\"\"
        return [auth() for auth in self.authentication_classes]
绕来绕去,最终明白,我们可以在视图类中定义 authentication_classes 列表,存放认证类,在触发视图函数类时就会执行列表中认证类重写的 authenticate(self)方法,并放回登录的用户对象和auth
权限源码
APIView-->check_permissions(request)
get_permissions()是获取认证类对象列表
has_permission(request, self) 是我们自定义权限类时要改写的方法,返回True或False
    def check_permissions(self, request):
        for permission in self.get_permissions():
            if not permission.has_permission(request, self):
                self.permission_denied(
                    request,
                    message=getattr(permission, \'message\', None),
                    code=getattr(permission, \'code\', None)
                )
频率源码
APIView-->check_throttles(request)
    def check_throttles(self, request):
        throttle_durations = []
        for throttle in self.get_throttles():
            if not throttle.allow_request(request, self):
                throttle_durations.append(throttle.wait())
        if throttle_durations:
            durations = [
                duration for duration in throttle_durations
                if duration is not None
            ]
            duration = max(durations, default=None)
            self.throttled(request, duration)
在调用自定义认证类时视图类中需要提前定义的参数
class APIView(View):

    # The following policies may be set at either globally, or per-view.
    renderer_classes = api_settings.DEFAULT_RENDERER_CLASSES
    parser_classes = api_settings.DEFAULT_PARSER_CLASSES
    authentication_classes = api_settings.DEFAULT_AUTHENTICATION_CLASSES  # 认证类列表
    throttle_classes = api_settings.DEFAULT_THROTTLE_CLASSES              # 频率限制类
    permission_classes = api_settings.DEFAULT_PERMISSION_CLASSES          # 权限类
    content_negotiation_class = api_settings.DEFAULT_CONTENT_NEGOTIATION_CLASS
    metadata_class = api_settings.DEFAULT_METADATA_CLASS
    versioning_class = api_settings.DEFAULT_VERSIONING_CLASS
三个认证类在 drf 配置文件中的配置
DEFAULTS = {
    \'DEFAULT_AUTHENTICATION_CLASSES\': [
        \'rest_framework.authentication.SessionAuthentication\',
        \'rest_framework.authentication.BasicAuthentication\'
    ],
    \'DEFAULT_PERMISSION_CLASSES\': [
        \'rest_framework.permissions.AllowAny\',
    ],
    \'DEFAULT_THROTTLE_CLASSES\': [],
}
先写一个登录视图类
校验过登录用户数据之后把token信息存到usertoken表中
class LoginViewSet(ModelViewSet):
    queryset = models.User.objects
    serializer_class = UserSerializer

    @action(methods=[\'POST\'], detail=False)  # api 要多写一个 login/
    def login(self, request):
        username = request.data.get(\'username\')
        password = request.data.get(\'password\')
        user_obj = models.User.objects.filter(username=username, password=password).first()
        if not user_obj:
            return Response({\'code\': 1001, \'msg\': \'该用户不存在\'})
        uuid_str = str(uuid.uuid4())
        # 过滤条件中user=user的对象,而不是pk
        models.UserToken.objects.update_or_create(user=user_obj, defaults={\'token\': uuid_str})  # 别漏写default后的字典
        return Response({\'code\': 1000, \'msg\': \'登录成功\', \'token\': uuid_str})
认证
1、新建一个认证模块,写一个认证类继承 BaseAuthentication(多态),重写authenticate方法,在方法中校验是否登录,是则返回两个值(request.user 和 request.auth)
from rest_framework.authentication import BaseAuthentication
# 登录认证
class LoginAuth(BaseAuthentication):
def authenticate(self, request):
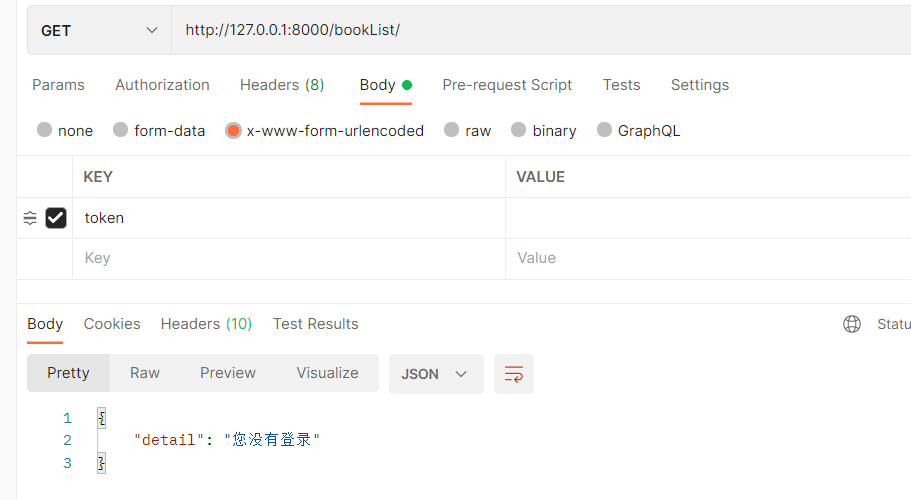
token = request.data.get(\'token\')
is_login = models.UserToken.objects.filter(token=token).first()
if not is_login:
raise AuthenticationFailed(\'您没有登录\')
return is_login.user, token
2、在视图类中书写 authentication_classes,存放导入进来的认证类
- 局部配置
from app01.authentications import LoginAuth, ChangePermission

class BookViewSet(ViewSetMixin, ListAPIView):
    queryset = models.Book.objects
    serializer_class = BookModelSerializer
    authentication_classes = [LoginAuth, ]
- 局部禁用
class BookViewSet(ViewSetMixin, ListAPIView):
    queryset = models.Book.objects
    serializer_class = BookModelSerializer
    authentication_classes = []
3、全局配置(在项目文件夹下的 settings.py 文件中配置)
REST_FRAMEWORK = {
    \'DEFAULT_AUTHENTICATION_CLASSES\': [
        \'app01.authentications.LoginAuth\',
    ],
}
权限
1、在认证模块中,写一个权限类继承 BasePermission(多态),重写has_permission方法,在方法中校验该用户的用户类型,是否有权限执行该视图类,返回 True 或者 False, 还可以自定义报错信息 self.message
from rest_framework.permissions import BasePermission

class ChangePermission(BasePermission):
    def has_permission(self, request, view):
        self.message = \'您是%s,没有修改权限\' % request.user.get_user_type_display()  # 根据源码,可以修改权限的提示信息
        user_type = request.user.user_type
        if user_type != 1:
            return False
        return True
2、在视图类中书写 permission_classes,存放导入进来的权限类
- 局部配置
注意:在定义权限认证类前需要先定义登录认证类,否则没有用户对象 requset.user 来做权限认证
from app01.authentications import LoginAuth, ChangePermission

class BookViewChange(ViewSetMixin, CreateAPIView, RetrieveUpdateDestroyAPIView):
    queryset = models.Book.objects
    serializer_class = BookModelSerializer
    authentication_classes = [LoginAuth, ]
    permission_classes = [ChangePermission, ]
- 局部禁用
class BookViewChange(ViewSetMixin, CreateAPIView, RetrieveUpdateDestroyAPIView):
    queryset = models.Book.objects
    serializer_class = BookModelSerializer
    authentication_classes = [LoginAuth, ]
    permission_classes = []
3、全局配置(在项目文件夹下的 settings.py 文件中配置)
REST_FRAMEWORK = {
    \'DEFAULT_PERMISSION_CLASSES\': [
        \'app01.authentications.ChangePermission\',
    ],
}

频率
1、在认证模块中,写一个频率限制类继承 SimpleRateThrottle(多态),重写类属性 scope 和 get_cache_key方法,该方法返回什么,就以什么为限制,scope配置文件中要用
from rest_framework.throttling import SimpleRateThrottle
# 频率限制
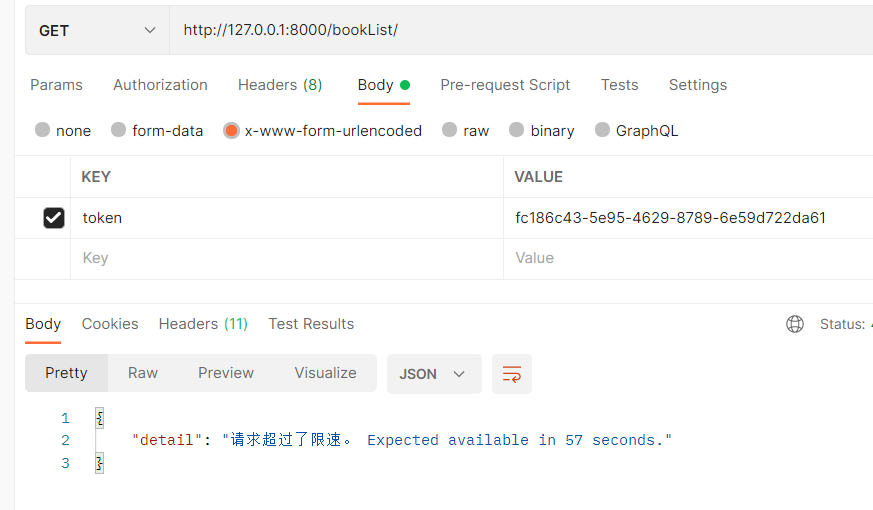
class IPThrottling(SimpleRateThrottle):
scope = \'minute_3\'
# 返回什么就以什么做限制
def get_cache_key(self, request, view):
# return request.META.get(\'REMOTE_ADDR\') # 客户端ip地址
return request.user.id # 用户id
2、与其它两个认证不同,他需要在项目配置文件中配置:
REST_FRAMEWORK = [
    \'DEFAULT_THROTTLE_RATES\': {
        \'minute_3\': \'3/m\'  # minute_3是scope的字符串,一分钟访问3次
        \'minute_5\':\'5/m\'
    }
]
2、在视图类中书写 throttle_classes,存放导入进来的权限类
- 局部配置
class BookViewSet(ViewSetMixin, ListAPIView):
    queryset = models.Book.objects
    serializer_class = BookModelSerializer
    authentication_classes = [LoginAuth, ]
    throttle_classes = [IPThrottling, ]
- 局部禁用
class BookViewSet(ViewSetMixin, ListAPIView):
    queryset = models.Book.objects
    serializer_class = BookModelSerializer
    authentication_classes = [LoginAuth, ]
    throttle_classes = []
3、全局配置(在项目文件夹下的 settings.py 文件中配置)
REST_FRAMEWORK = {
    \'DEFAULT_THROTTLE_CLASSES\': [
        \'app01.authentications.IPThrottling\'
    ],
    \'DEFAULT_THROTTLE_RATES\': {
        \'minute_3\': \'3/m\',  # minute_3是scope的字符串,一分钟访问3次
        # \'minute_5\': \'5/m\'
    }
}
来源:https://www.cnblogs.com/elijah-li/p/16114987.html
本站部分图文来源于网络,如有侵权请联系删除。