 百木园
百木园![]() 容器(可以用来管理所有的组件(类))
容器(可以用来管理所有的组件(类))
核心关注:IOC和AOP
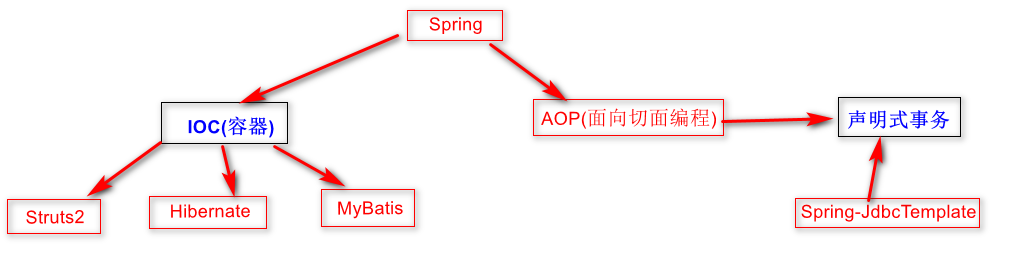
1.IOC
Inversion(反转) Of Control:控制反转
    控制:资源的获取方式
        1.主动式(要什么资源自己创建)
            Person{
                Book book=new Book();
                Dog dog=new Dog();
                //复杂对象的创建时比较庞大的工程
            }
        2.被动式:资源的获取不是自己创建,而是交给一个容器创建和设置
            Person{
                Book book;
                public void test(){
                    book.read();
                }
            }
    容器:管理所有的组件(有功能的类),主动的new资源改为被动的接受资源
1.1 DI(Dependency Injection)依赖注入
容器能知道哪个组件(类)运行的时候,需要另外一个组件(类);
容器通过反射的形式,将容器中准备好的Book对象注入(利用反射给属性赋值)到Person中
IOC只是思想,而DI是具体的实现
代码实现:
    1.实体类
    public class Person {
        private String name;
        private Integer age;
        private String gender;
        private String email;
        public Person() {
            System.out.println(\"person的构造器!\");
        }
        public void setName(String name) {
            System.out.println(\"设置pserson的name\");
            this.name = name;
        }
        public void setAge(Integer age) {
            System.out.println(\"设置person的age\");
            this.age = age;
        }
        public void setGender(String gender) {
            System.out.println(\"设置person的gender\");
            this.gender = gender;
        }
        public void setEmail(String email) {
            System.out.println(\"设置person的email\");
            this.email = email;
        }
      ....
      ...get()
    }
    2.spring的配置文件ioc.xml
        <?xml version=\"1.0\" encoding=\"UTF-8\"?>
        <beans xmlns=\"http://www.springframework.org/schema/beans\"
               xmlns:xsi=\"http://www.w3.org/2001/XMLSchema-instance\"
               xsi:schemaLocation=\"http://www.springframework.org/schema/beans http://www.springframework.org/schema/beans/spring-beans.xsd\">
            <!--注册person对象,spring会自动创建这个person对象-->
            <bean class=\"com.Person\" id=\"person01\">
                <property name=\"age\" value=\"18\"></property>------------->name是bean中的属性,通过set方法反射注入
                <property name=\"email\" value=\"244594537@qq.com\"/>
                <property name=\"gender\" value=\"男\"/>
                <property name=\"name\" value=\"吴孟达\"/>
            </bean>
        </beans>
    3.测试类:
        public class Test {
            public static void main(String[] args) {
                System.out.println(\"启动spring容器....\");
                ApplicationContext ioc=new ClassPathXmlApplicationContext(\"ioc.xml\");--------->启动spring的配置文件
                System.out.println(\"spring容器启动成功!\");
                Person person= (Person) ioc.getBean(\"person01\");----------->此处的person01为spring配置文件中的bean的id
                System.out.println(person);
            }
        }
    输出:
        启动spring容器....
        person的构造器!
        设置person的age
        设置person的email
        设置person的gender
        设置pserson的name
        spring容器启动成功!
        Person{name=\'吴孟达\', age=18, gender=\'男\', email=\'244594537@qq.com\'}

结论:------>发现其执行顺序为:
    1.<bean...>元素驱动spring容器调用构造器创建对象
    2.<property...>元素驱动spring执行setter方法
如果一个实体类中引用了其他实体类,容器加载的执行顺序
1.第一种情况:范围大的(person引用book)在范围小的前面
    spring配置文件内容:
        <bean id=\"person01\" class=\"entity.Person\">
            <property name=\"age\" value=\"18\"></property>
            <property name=\"name\" value=\"吴孟达\"></property>
            <property name=\"book\" ref=\"book\"/>
        </bean>
        <bean id=\"book\" class=\"entity.Book\">
            <property name=\"name\" value=\"java分析\"/>
            <property name=\"price\" value=\"32\"/>
        </bean>
    实体类信息:
    。。。
    测试类信息:
        public static void main(String[] args) {
            System.out.println(\"加载spring....\");
            ApplicationContext ac=new ClassPathXmlApplicationContext(\"ioc.xml\");
            System.out.println(\"spring容器启动成功!\");
            Person person= (Person) ac.getBean(\"person01\");
            System.out.println(person.toString());
        }
    输出:
        加载spring....
        person实例化!
        Book实例化!
        Book执行set name方法
        Book执行set price方法
        person执行set age方法
        person执行set name方法
        spring容器启动成功!
    发现执行顺序为:
        1.先实例化两个对象
        2.在执行小的set方法
        3.再执行大的set方法


第二种情况:小范围的在上
    spring配置文件内容:
      <bean id=\"book\" class=\"entity.Book\">
        <property name=\"name\" value=\"java分析\"/>
        <property name=\"price\" value=\"32\"/>
    </bean>
    <bean id=\"person01\" class=\"entity.Person\">
        <property name=\"age\" value=\"18\"></property>
        <property name=\"name\" value=\"吴孟达\"></property>
        <property name=\"book\" ref=\"book\"/>
    </bean>
      输出:
        Book实例化!
        Book执行set name方法
        Book执行set price方法
        person实例化!
        person执行set age方法
        person执行set name方法
        spring容器启动成功!
    执行顺序为:
        1.小范围对象实例化
        2.小范围对象set方法
        3.大范围对象实例化
        4.大范围对象set方法
2.源码解析
1.
 以此为示例:
     <bean id=\"book\" class=\"entity.Book\"></bean>
    实际上<bean.../>元素默认一反射的方式来调用该类的无参构造器
    底层简单源码如下:
        String idStr=...;//解析<bean。。。。/>元素的id属性得到该字段的字符串值为\"book\"
        String classStr=...;//解析class属性得到该字段的值为:entity.Book
        Class clazz=Class.forName(classStr);
        Object object=clazz.newInstance();//通过反射示例化对象
        container.put(idstr,obj);//将对象放入容器给中,container为spring容器

2.
   <bean id=\"person01\" class=\"entity.Person\">
        <property name=\"book\" ref=\"book\"/>
    </bean>
    底层的简单源码如下:
        String nameStr=...;解析<property.../>元素的name属性得到该字符串的值为book
        String refStr=..;解析<property.../>元素的ref属性得到该字符串的值为book
        String setterName-\"set\"+nameStr.subString(0,1).toUpperCase()+name.subString(1);//生成将要调用的setter方法】
        Object paramBean=container.get(refStr);//从容器中取到refStr的bean,作为传入参数
        Method setter=clazz.getMethod(setterName,parmBean.getClass())//此处的clazz和1的对应起来
        setter.incoke(obj,parmBean);//此处的obj和1的对应起来
3.组件在spring容器中是单例的
public static void main(String[] args) {
        System.out.println(\"加载spring....\");
        ApplicationContext ac=new ClassPathXmlApplicationContext(\"ioc.xml\");
        System.out.println(\"spring容器启动成功!\");
        Person person1= (Person) ac.getBean(\"person01\");
        Person person2= (Person) ac.getBean(\"person01\");
        System.out.println(person1==person2);------------------------->此时输出为true;
}
4.使用构造器为bean的属性赋值
spring配置文件为:
    <bean id=\"book\" class=\"entity.Book\">
        <property name=\"name\" value=\"java分析\"/>
        <property name=\"price\" value=\"32\"/>
    </bean>
    <bean id=\"person01\" class=\"entity.Person\">-------------------------------->此处有两个person的bean:这一个使用set方法给属性赋值,调用的是无参构造器
        <property name=\"age\" value=\"18\"></property>
        <property name=\"name\" value=\"吴孟达\"></property>
        <property name=\"book\" ref=\"book\"/>
    </bean>
    <bean id=\"person02\" class=\"entity.Person\">------------------------------>这里调用的是有参构造器来进行属性赋值
        <constructor-arg name=\"age\" value=\"18\"></constructor-arg>
        <constructor-arg name=\"book\" ref=\"book\"></constructor-arg>
        <constructor-arg name=\"name\" value=\"吴孟达02\"></constructor-arg>
    </bean>
person类的代码:
    public class Person {
        private String name;
        private Integer age;
        private Book book;
        public Person() {
            System.out.println(\"person执行无参构造器\");
        }
        public Person(String name, Integer age, Book book) {
            this.name = name;
            this.age = age;
            this.book = book;
            System.out.println(\"person执行有参构造器\");
        }
        get/set方法
    }
测试类方法:
    public static void main(String[] args) {
        System.out.println(\"加载spring....\");
        ApplicationContext ac=new ClassPathXmlApplicationContext(\"ioc.xml\");
        System.out.println(\"spring容器启动成功!\");
        Person person= (Person) ac.getBean(\"person02\");
        System.out.println(person.toString());
    }
输出:
    加载spring...
    Book实例化!
    Book执行set name方法
    Book执行set price方法
    person执行无参构造器-------------->调用无参构造器实例化对象,然后调用set方法赋值
    person执行set age方法
    person执行set name方法
    person执行有参构造器-------------->调用有参构造器,并且直接赋值
    spring容器启动成功!
    Person{name=\'吴孟达02\', age=18, book=Book{name=\'java分析\', price=32}}
5.使用p名称空间为bean属性赋值
1.在spring的xml文件中加入这一句:xmlns:p=\"http://www.springframework.org/schema/p\"
    <?xml version=\"1.0\" encoding=\"UTF-8\"?>
    <beans xmlns=\"http://www.springframework.org/schema/beans\"
       xmlns:xsi=\"http://www.w3.org/2001/XMLSchema-instance\"
       xmlns:p=\"http://www.springframework.org/schema/p\"----------------------------------->加入这一句
       xsi:schemaLocation=\"http://www.springframework.org/schema/beans http://www.springframework.org/schema/beans/spring-beans.xsd\">
        <bean id=\"book\" class=\"entity.Book\">
            <property name=\"name\" value=\"java分析\"/>
            <property name=\"price\" value=\"32\"/>
        </bean>
        <bean id=\"person03\" class=\"entity.Person\" p:age=\"18\" p:name=\"吴孟达03\" p:book-ref=\"book\"></bean>------>此时可以通过p标签进行赋值
    </beans>
6.复杂赋值
1.给属性赋值null
    <bean id=\"person04\" class=\"entity.Person\">
        <property name=\"name\">
            <null></null>---------------------------->使用null标签进行赋值:不能使用<property name=\"name\" value=\"null\">这是付了一个null的字符串
        </property>
    </bean>

2.属性是引用时
    2.1引用外部bean
        <bean id=\"book\" class=\"entity.Book\">
            <property name=\"name\" value=\"java分析\"/>
            <property name=\"price\" value=\"32\"/>
        </bean>
        <bean id=\"person04\" class=\"entity.Person\">
            <property name=\"name\">
                <null></null>
            </property>
            <property name=\"book\" ref=\"book\"></property>------------->如果外边已经有了像引用的Book bean,则使用ref引用:这里意思是:book=ioc.getBean(\"book\")
        </bean>
        测试代码:
            ApplicationContext ioc=new ClassPathXmlApplicationContext(\"ioc.xml\");
            Person person= (Person) ioc.getBean(\"person04\");
            System.out.println(ioc.getBean(\"book\")==person.getBook());------------->此时输出为true
    2.2内部引用
        <bean id=\"person04\" class=\"entity.Person\">
            <property name=\"name\">
                <null></null>
            </property>
            <property name=\"book\">
                <!--对象我们可以使用bean标签创建 book=new Book();引用内部bean-->
                <bean class=\"entity.Book\">---------------------------------------->此处需要注意的是:内部bean不能直接通过ioc容器获取:
                    <property name=\"name\" value=\"java\"></property>           ----->如<bean id=\"bookInner\" class=\"entity.Book\">内部bean加上id
                    <property name=\"price\" value=\"25\"></property>            ------>ioc.getBean(\"bookInner\")会获取出错!
                </bean>
            </property>
        </bean>
        测试代码为:
             ApplicationContext ioc=new ClassPathXmlApplicationContext(\"ioc.xml\");
            Person person= (Person) ioc.getBean(\"person04\");
            System.out.println(ioc.getBean(\"book\")==person.getBook());------------->此时输出为false

3.为list属性赋值
    为psrson新增属性
        private List<Book> library;
    如何为library赋值
        <property name=\"library\">
            <!--library=new ArrayLiast<Book>-->
            <list>-------------------------------->使用过list标签
                <bean class=\"entity.Book\" p:name=\"java\" p:price=\"14\"></bean>------>1.用bean标签创建list元素
                <ref bean=\"book\"></ref>-------------------------------------------->2.用ref标签引入外部bean
            </list>
        </property>

4.为map赋值
    为person新增一个属性
        private Map map;
    springxml中的配置
      <property name=\"map\">
            <map>-------------------------------------------->使用map标签:map=new HashMap<>();
                <entry key=\"key01\" value=\"张三\"></entry>
                <entry key=\"key02\" value=\"18\"></entry>
                <entry key=\"book01\" value-ref=\"book\"></entry>----->可以使用value-ref引入外部bean
                <entry key=\"key04\">
                    <bean class=\"entity.Person\" p:name=\"吴孟达\" p:age=\"18\" p:book-ref=\"book\"></bean>------>也可以使用该方式引入内部bean
                </entry>
                <entry key=\"key05\">---->map中嵌套map
                    <map>

                    </map>
                </entry>
            </map>
        </property>

5.为Properties赋值
    person新增一个属性:
        private Properties properties;
    spring的配置文件中:
        <property name=\"properties\">
            <!--properties=new Properties();所有的k=v都是String-->
            <props>
                <!--k=v都是string,值直接写在标签中-->
                <prop key=\"username\">root</prop>
                <prop key=\"password\">123456</prop>
            </props>
        </property>

6.使用util名称空间创建集合类型的bean
    使用场景:如果相同的map或者list在多处都有引用
    可以将map或list单独拿出来做个bean
    使用步骤
        1.在spring的配置文件中加入:xmlns:util=\"http://www.springframework.org/schema/util\"
            <?xml version=\"1.0\" encoding=\"UTF-8\"?>
            <beans xmlns=\"http://www.springframework.org/schema/beans\"
                   xmlns:xsi=\"http://www.w3.org/2001/XMLSchema-instance\"
                   xmlns:p=\"http://www.springframework.org/schema/p\"
                   xmlns:util=\"http://www.springframework.org/schema/util\"---------------------->在spring的配置文件中加入这行
                   xsi:schemaLocation=\"http://www.springframework.org/schema/beans http://www.springframework.org/schema/beans/spring-beans.xsd\">
                   。。。。。
               </bean>
       2.
           <!--相当于new LinkedHashMap<>()-->
            <util:map id=\"mymap\">
                <!--往map中添加元素-->
                <entry key=\"key01\" value=\"张三\"></entry>
                <entry key=\"key02\" value=\"18\"></entry>
                <entry key=\"book01\" value-ref=\"book\"></entry>
                <entry key=\"key04\">
                    <bean class=\"entity.Person\" p:name=\"吴孟达\" p:age=\"18\" p:book-ref=\"book\"></bean>
                </entry>
                <entry key=\"key05\">
                    <map></map>
                </entry>
            </util:map>
        3.其他地方的使用
            <property name=\"map\" ref=\"mymap\"></property>----->直接根据引用获取即可
            也可以在代码中直接获取
            Map<String,Object> map= (Map<String, Object>) ioc.getBean(\"mymap\");

7.util:list的使用和list标签类似
    <util:list id=\"mylist\">
        <bean class=\"entity.Person\" p:book=\"西游\" p:name=\"吴孟达\"></bean>
        <ref bean=\"mymap\"></ref>
        <value>12</value>
    </util:list>
8.级联属性:属性的属性
    <bean id=\"book\" class=\"entity.Book\">
        <property name=\"name\" value=\"java分析\"/>
        <property name=\"price\" value=\"32\"/>
    </bean>
    <bean id=\"person05\" class=\"entity.Person\">
        <property name=\"book\" ref=\"book\"></property>
        <property name=\"book.price\" value=\"1000\"></property>
        ----->这里通过book.price直接更改:person的book属性的price属性:但这里注意的是这里一改,容器中的book的bean的price属性改为1000
    </bean>

9.通过继承实现bean属性的重用
    <bean id=\"person01\" class=\"entity.Person\">
        <property name=\"age\" value=\"18\"></property>
        <property name=\"name\" value=\"吴孟达\"></property>
        <property name=\"book\" ref=\"book\"/>
    </bean>
    这里需要一个personbean,其他属性都一样,只有age属性变为19,则可以这样
    <bean id=\"person06\" class=\"entity.Person\" parent=\"person01\">--------->使用parent属性,指定需要继承属性的bean id,这里的继承只是当前bean的配置信息继承,并不是真正的类继承
        <property name=\"name\" value=\"刘丹\"></property>
    </bean>
    结论:
       1. 这里的person01和pserson06在容器中是不同的组件(对象)
       2.这两个组件的属性都相同,只有name属性值不同
       3.因为指定了要继承配置信息的类,所以上述还可以这样写
            <bean id=\"person06\" parent=\"person01\">-------------------------->省略了class,因为配置信息继承于person01,所以class配置值可以继承person01的class配置值值
                     <property name=\"name\" value=\"刘丹\"></property>
            </bean>
        4.父类的信息不会因为子类而更改!
10.专门建立一个供其他bean继承的bean
     <bean id=\"person01\" class=\"entity.Person\" abstract=\"true\">----------------------->加入:abstract=\"true\"
        <property name=\"age\" value=\"18\"></property>
        <property name=\"name\" value=\"吴孟达\"></property>
        <property name=\"book\" ref=\"book\"/>
    </bean>
    abstract=\"true\"这个bean的配置是一个抽象的,不能获取他的实例,只能被别人继承
    此时:
        ioc.getBean(\"person01\");-------------------->此时获取会报错,因为这个是被其他bean继承的
7.bean的作用域
1.单例:scope=\"singleton\"
    <bean id=\"person05\" class=\"entity.Person\" scope=\"singleton\">
        <property name=\"book\" ref=\"book\"></property>
        <property name=\"book.price\" value=\"1000\"></property>
    </bean>
2.多例:scope=\"prototype\"
    <bean id=\"person05\" class=\"entity.Person\" scope=\"prototype\">
        <property name=\"book\" ref=\"book\"></property>
        <property name=\"book.price\" value=\"1000\"></property>
    </bean>
结论:
    1.scope=\"singleton\"单例模式:默认
        1.1在容器启动完成前就已经创建好对象,保存在容器中
        1.2任何获取都是获取之前创建好的对象
    2.scope=\"prototype\"多例模式
        2.1容器启动默认不会创建多例的bean
        2.2每次获取的时候创建这个bean(ioc.getBean(\"person05\"))
        2.3每次获取都会创建一个新的对象
8.bean的生命周期(自定义初始化方法和销毁方法)
1.当是单例模式
    1.person实体类
        public class Person {
            //person的无参构造器
            public Person() {
                System.out.println(\"person的无参构造器方法...\");
            }
            //自定义初始化方法
            public void initMethod(){
                System.out.println(\"person的初始化方法\");
            }
            //自定义对象销毁方法
            public void destroyMethod(){
                System.out.println(\"person的销毁方法\");
            }
        }
    2.spring的配置文件
        <bean id=\"person\" class=\"entity.Person\"
          init-method=\"initMethod\"--------------------------->指定自定义的初始化方法
          destroy-method=\"destroyMethod\"--------------------->指定自定义的销毁方法
        >
        </bean>
    3.测试类
        public static void main(String[] args) {
            System.out.println(\"spring容器启动...\");
            ConfigurableApplicationContext ioc=new ClassPathXmlApplicationContext(\"ioc.xml\");
            System.out.println(\"spring容器启动成功!\");
            System.out.println(\"关闭spring容器...\");
            ioc.close();---------------------------------------->调用容器的停止方法
            System.out.println(\"关闭spring容器成功!\");
        }
    输出:
        spring容器启动...
        person的无参构造器方法...
        person的初始化方法
        spring容器启动成功!
        关闭spring容器...
        person的销毁方法
        关闭spring容器成功!

2.当是多例模式
    2.1ioc的配置文件
            <bean id=\"person\" class=\"entity.Person\"
                  scope=\"prototype\"---------------------------->多例模式
                  init-method=\"initMethod\"
                  destroy-method=\"destroyMethod\"
            >
            </bean>
        测试代码:
            public static void main(String[] args) {
                System.out.println(\"spring容器启动...\");
                ConfigurableApplicationContext ioc=new ClassPathXmlApplicationContext(\"ioc.xml\");
                System.out.println(\"spring容器启动成功!\");
                System.out.println(\"关闭spring容器...\");
                ioc.close();
                System.out.println(\"关闭spring容器成功!\");
            }
        输出:
            spring容器启动...
            spring容器启动成功!
            关闭spring容器...
            关闭spring容器成功!
        因为多例模式不是容器启动的时候创创建,而是在ioc.getBean(\"id\")时候创建该对象!

     2.2当测试代码为:
            public static void main(String[] args) {
                System.out.println(\"spring容器启动...\");
                ConfigurableApplicationContext ioc=new ClassPathXmlApplicationContext(\"ioc.xml\");
                System.out.println(\"spring容器启动成功!\");
                ioc.getBean(\"person\");------------------------>多例模式获取bean对象
                System.out.println(\"关闭spring容器...\");
                ioc.close();
                System.out.println(\"关闭spring容器成功!\");
            }
        输出:
            spring容器启动...
            spring容器启动成功!
            person的无参构造器方法...
            person的初始化方法
            关闭spring容器...
            关闭spring容器成功!

结论:
    1.当是单例模式时:Bean的生命周期
        (容器启动)构造器方法---->初始化方法----->(容器关闭)销毁方法
    2.多实例
        获取bean(构造器------>初始化方法---->容器关闭(不会调用销毁方法))
9.Bean的后置处理器
1.自定义一个类实现BeanPostProcessor接口
    public class MyBeanPostProcess  implements BeanPostProcessor {
    /**
     * 自定义的初始化方法之前调用
     * Object o是容器创建的bean
     * String s是spring配置文件中配置的id
     */
    public Object postProcessBeforeInitialization(Object o, String s) throws BeansException {
        System.out.println(\"bean的后置处理器Befor...方法\");
        System.out.println(s+\":\"+o);
        return o;----->注意:这里不能return null,要不会报错
    }
    //自定义初始化方法之后执行
    public Object postProcessAfterInitialization(Object o, String s) throws BeansException {
        System.out.println(\"bean的后置处理器After...方法\");
        System.out.println(s+\":\"+o);
        return o;------------------------->注意:这里如果return null;则ioc.getBean也是为null;
    }
}
2.在spring配置文件中配置后置处理器
    <!--实体类配置-->
    <bean id=\"person01\" class=\"entity.Person\"
         init-method=\"initMethod\"----------------------->perosn类的自定义初始化方法(person实例化时后会调用)
         destroy-method=\"destroyMethod\">----------------->person类的自定义销毁方法(spring容器销毁前会调用)
        <property name=\"age\" value=\"18\"></property>
        <property name=\"name\" value=\"吴孟达\"></property>
    </bean>
    <!--后置处理器配置-->
    <bean id=\"myBeanPostProcess\" class=\"Test.MyBeanPostProcess\"></bean>
3.测试代码如下:
    public static void main(String[] args) {
        System.out.println(\"加载spring....\");
        ApplicationContext ioc=new ClassPathXmlApplicationContext(\"ioc.xml\");
        System.out.println(\"spring容器启动成功!\");
        Object bean= ioc.getBean(\"person01\");
        System.out.println(\"容器获取的bean:\"+bean);
    }
4.输出:
    person执行无参构造器
    person执行set age方法
    person执行set name方法
    bean的后置处理器Befor...方法
    person01:Person{name=\'吴孟达\', age=18, book=null}
    person自定义的初始化方法
    bean的后置处理器After...方法
    person01:Person{name=\'吴孟达\', age=18, book=null}
    spring容器启动成功!
    容器获取的bean:Person{name=\'吴孟达\', age=18, book=null}
结论:
    发现带后置处理器的执行流程如下:
执行顺序:
- 1.bean实例化
- 2.执行bean的后置处理器的postProcessBeforeInitialization方法
- 3.执行自定义的初始化方法
- 4.执行bean后置处理器的postProcessAfterInitialization方法
来源:https://www.cnblogs.com/wmd-l/p/16226683.html
本站部分图文来源于网络,如有侵权请联系删除。