 百木园
百木园最近在极客时间上面学习丁雪丰老师的《玩转 Spring 全家桶》,看到一个在application.properties 里面生成随机数的例子,觉得很厉害,带着崇拜的心情去阅读了一下Spring的源码,总算搞清楚了它是怎么工作的,阅读优秀的源代码是一个很不错的学习方式,这篇文章就是记录一下这个学习的过程。
还是先通过示例来进入学习
首先我们建一个springboot的工程,入口程序如下, 就是打印出两个从配置文件中定义的value
@SpringBootApplication
@Slf4j
public class PropertySourceDemoApplication implements ApplicationRunner {
    @Value(\"${property.demo.test}\")
    private String hello;

    @Value(\"${property.demo.random}\")
    private int random_value;
    public static void main(String[] args) {
        SpringApplication.run(PropertySourceDemoApplication.class, args);
    }

    @Override
    public void run(ApplicationArguments args) throws Exception {
        log.info(\"{} {}\", hello, random_value);
    }
}
配置文件 application.properties
property.demo.random=${random.int}
property.demo.test=hello
程序输入出为 \"hello -14137621\", 这个-14137621就是我们生成的随机数
那么这个功能是怎么在spring-boot实现的呢?
准备阶段
首先我们需要工具类,我们自己可以设计一下,如果我们需要完成这项任务,那么我们需要两个最基本的类,一个是随机数生成类org.springframework.boot.env.RandomValuePropertySource,一个是读取配置文件类 org.springframework.boot.env.PropertiesPropertySourceLoader。我们来看下这两个类的代码。
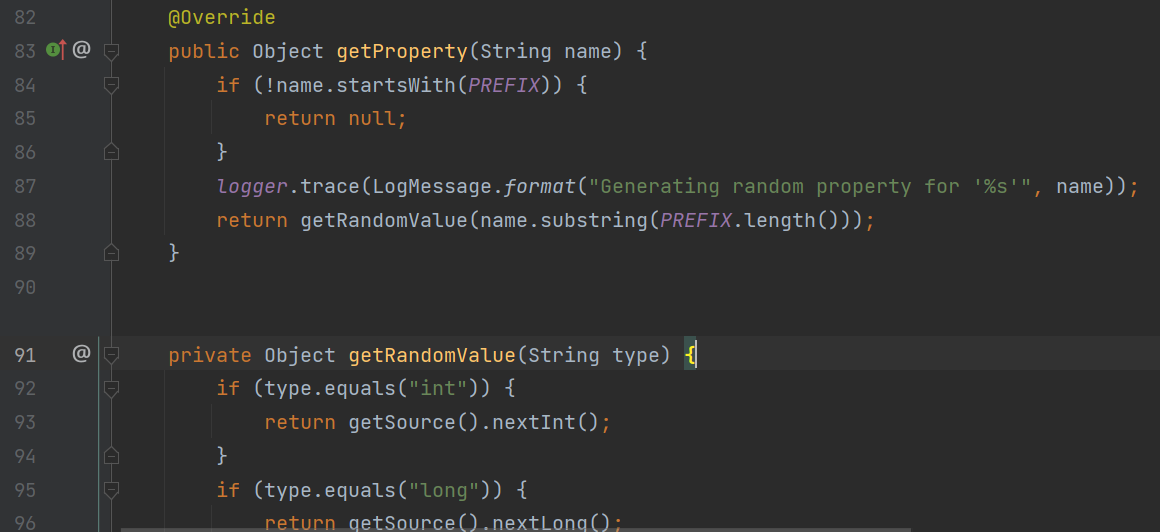
上图是RandomValuePropertySource, 我们可以看到它的getProperty方法就是看name是不是以random开头,是的话就生成随机数返回,这就是我们为什么值为${random.int}
再来看PropertiesPropertySourceLoader
public class PropertiesPropertySourceLoader implements PropertySourceLoader {

	private static final String XML_FILE_EXTENSION = \".xml\";

	@Override
	public String[] getFileExtensions() {
		return new String[] { \"properties\", \"xml\" };
	}

	@Override
	public List<PropertySource<?>> load(String name, Resource resource) throws IOException {
		List<Map<String, ?>> properties = loadProperties(resource);
		if (properties.isEmpty()) {
			return Collections.emptyList();
		}
		List<PropertySource<?>> propertySources = new ArrayList<>(properties.size());
		for (int i = 0; i < properties.size(); i++) {
			String documentNumber = (properties.size() != 1) ? \" (document #\" + i + \")\" : \"\";
			propertySources.add(new OriginTrackedMapPropertySource(name + documentNumber,
					Collections.unmodifiableMap(properties.get(i)), true));
		}
		return propertySources;
	}

	@SuppressWarnings({ \"unchecked\", \"rawtypes\" })
	private List<Map<String, ?>> loadProperties(Resource resource) throws IOException {
		String filename = resource.getFilename();
		List<Map<String, ?>> result = new ArrayList<>();
		if (filename != null && filename.endsWith(XML_FILE_EXTENSION)) {
			result.add((Map) PropertiesLoaderUtils.loadProperties(resource));
		}
		else {
			List<Document> documents = new OriginTrackedPropertiesLoader(resource).load();
			documents.forEach((document) -> result.add(document.asMap()));
		}
		return result;
	}

}
通过阅读这个代码我们可以看出或者猜测,它就是把后缀名是properties或者xml的文件读到内存中,实际上也是这样的。
有了这两个类,剩下的就是如何把它们组织起来,这是spring强大的地方,也是复杂的地方。
这里不同版本可能代码不一样,但是大同小异吧,我使用的是springboot 3.0.0。
这里把代码的组织结构贴出来


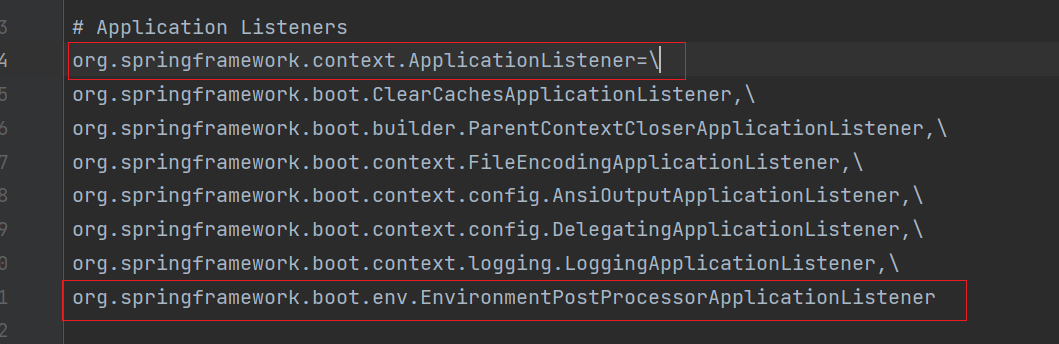
最后我们可以看到执行了ApplicationListener.onApplicationEvent.
我们打开spring.factories 中看到EnviormentPostProcessorApplicationListener实现了这个接口
打开它的代码可以看到

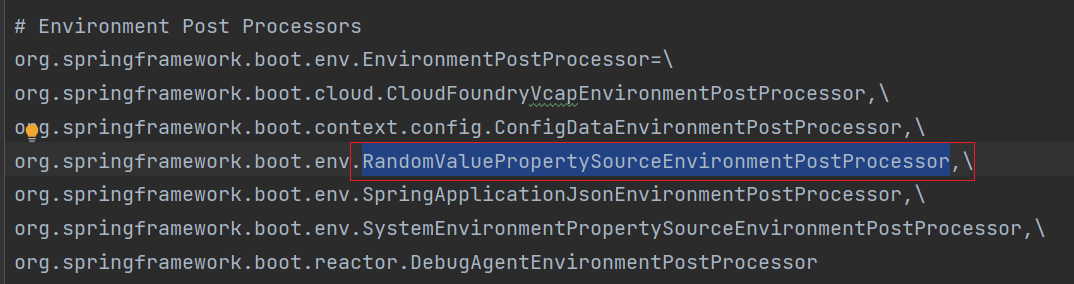
最后到了EnvironmentPostProcessor.postProcessEnvironment
这个EnvironmentPostProcessor也是在spring.factories里面配置了

可以看到这里调用了我们前面说的工具类的RandomValuePropertySource.addToEnvironment(environment, this.logger);
我们来看一眼它的代码

可以看到它就是把RandomValuePropertySource添加到Enviorment的PropertySources里面,留在后面用。 后面我们会看到它是怎么用。
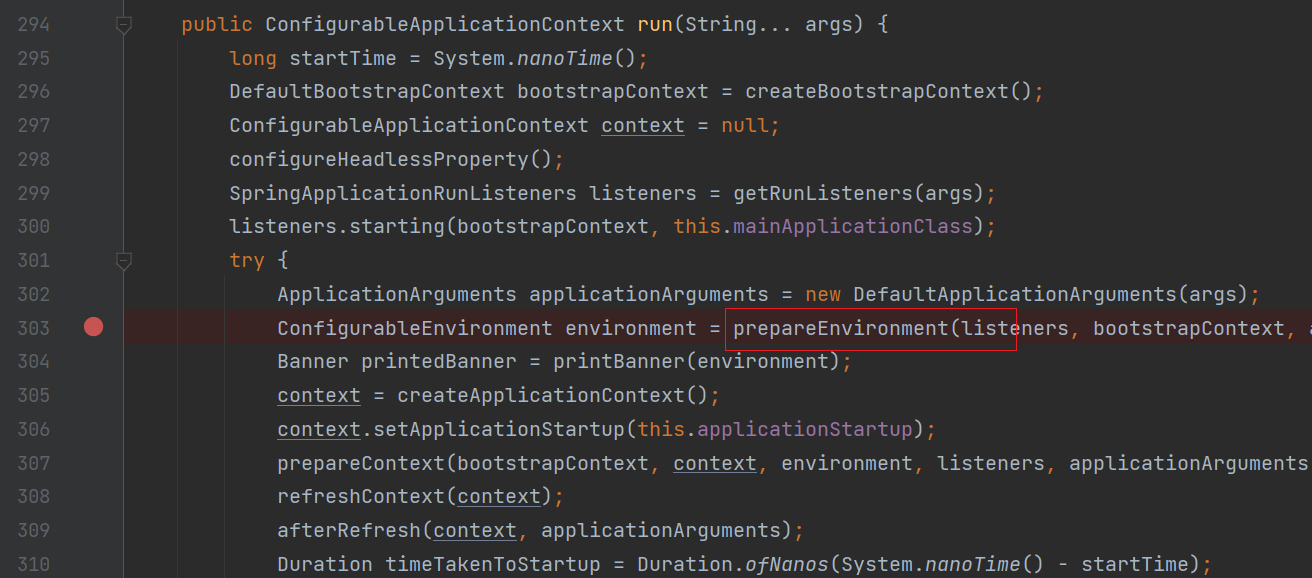
代码的流程大概是这样的
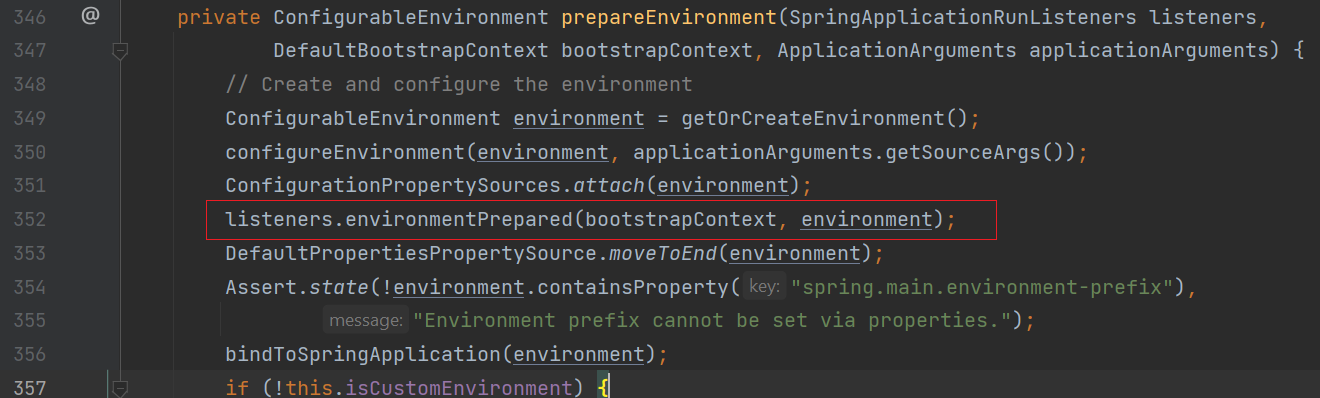
SpringApplication -> Run() -> prepareEnvironment() ->listeners.environmentPrepared(bootstrapContext, environment)
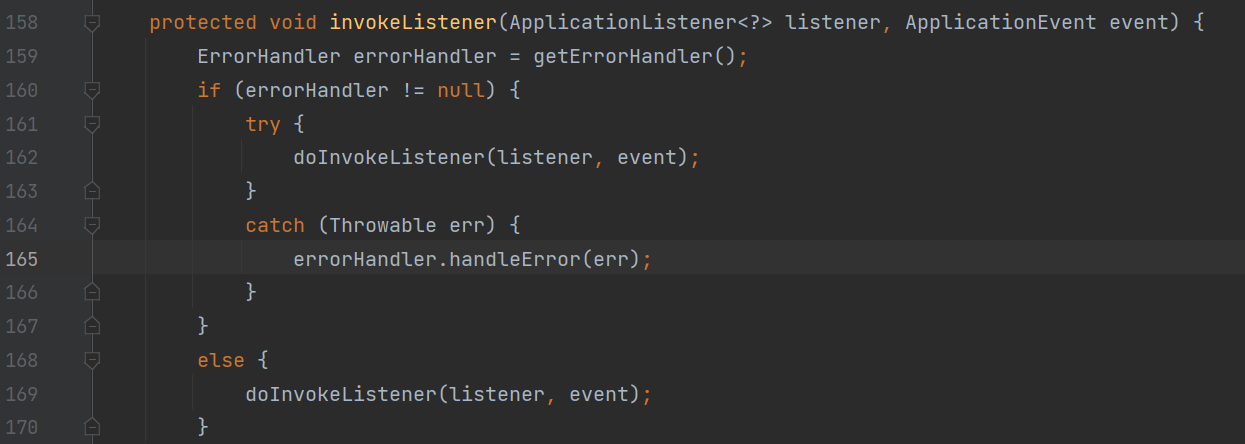
EventPublishingRunListener -> SimpleApplicationEventMulticaster -> multicastEvent() -> listener.onApplicationEvent(event)
onApplicationEnvironmentPreparedEvent-> RandomValuePropertySource.addToEnvironment()
代码到这里RandomValuePropertySource工具就准备好了, 读配置文件的类PropertiesPropertySourceLoader代码类似,这里不详述。
生成随机数
我原本以为读出配置文件后,就直接用RandomValuePropertySource生成了随机数,后来通过调试发现不是的,生成随机数是在Bean创建的时候,拿到需要注入的field的时候,再去找配置文件内存中找到,然后再生成的。 这个过程有些复杂,我花了不少时间才将它理出来。
SpringApplication.run
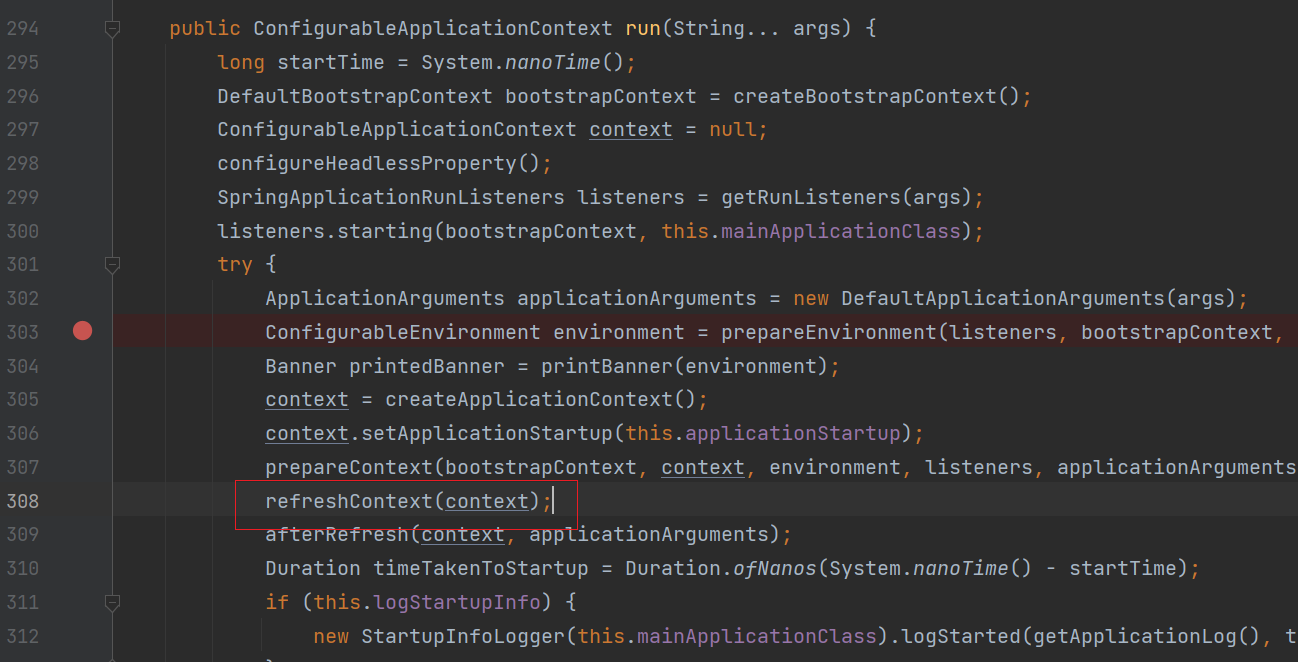
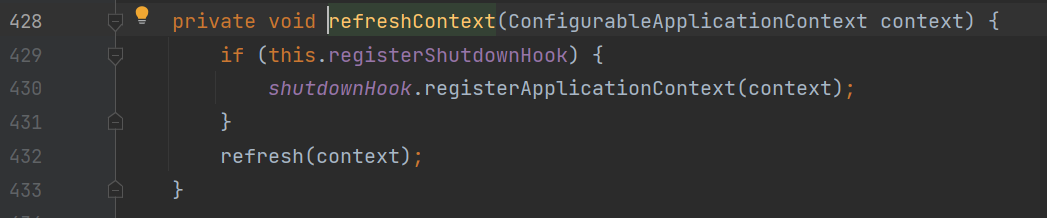

这里跳到到spring framework包里面的org.springframework.context.support.refresh()方法

这里图太多不贴了,只贴主要类和方法
AbstractApplicationContext.finishBeanFactoryInitialization -> DefaultListableBeanFactory.preInstantiateSingletons ->
DefaultListableBeanFactory.getBean ->
AbstractBeanFactory.getBean ->
AbstractAutowireCapableBeanFactory.createBean() ->
AbstractAutowireCapableBeanFactory.doCreateBean() ->
AbstractAutowireCapableBeanFactory.populateBean() ->
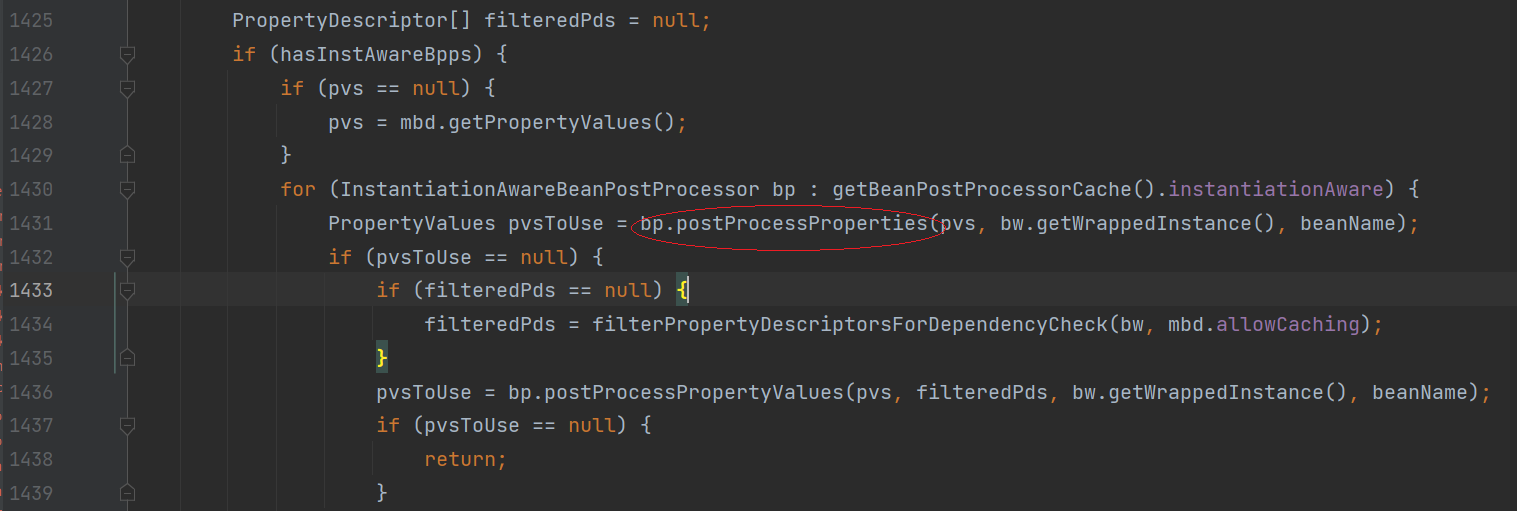
这里调用InstantiationAwareBeanPostProcessor.postProcessProperties 会有一个List,只有当对象是AutoWiredAnnotationBeanPostProcessor的时候才会调用我们的给注解加载值。
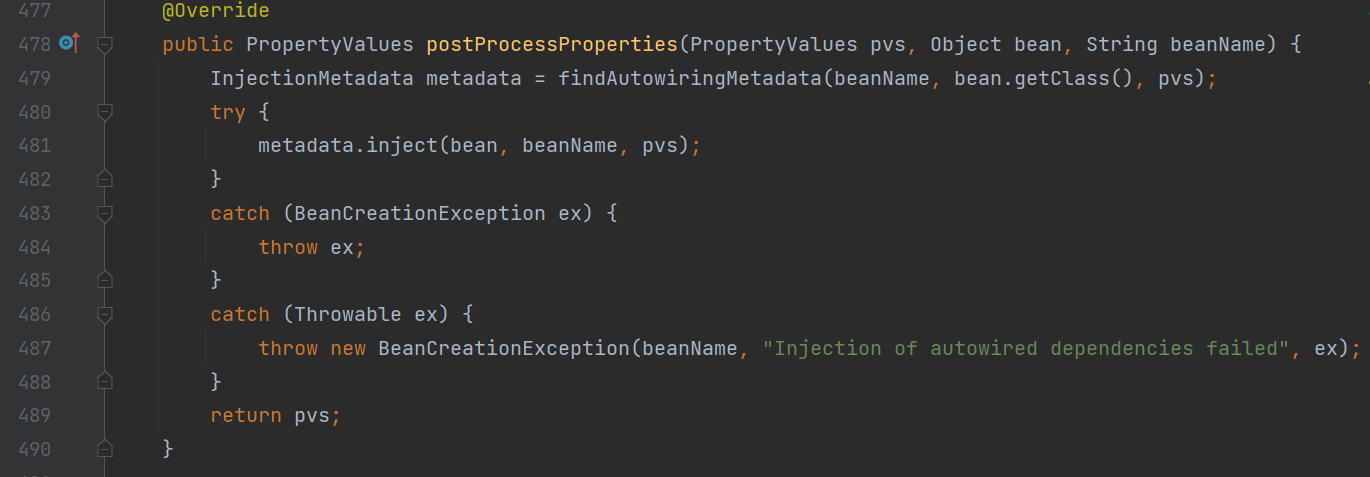
这里调用InjectMetadata.inject() 就是注入我们要的value.
InjectedElement.inject() ->
InjectionMetadata.getResourceToInject() ->
CommonAnnotationBeanPostProcessor.getResource() ->
CommonAnnotationBeanPostProcessor.autowireResource() ->
AutowireCapableBeanFactory.resolveDependency() ->
DefaultListableBeanFactory.doResolveDependency() ->
AbstractBeanFactory.resolveEmbeddedValue

这个embeddedValueResolvers是这么来的
beanFactory.addEmbeddedValueResolver(strVal -> getEnvironment().resolvePlaceholders(strVal));
AbstractPropertyResolver.resolvePlaceholders()
AbstractPropertyResolver.doResolvePlaceholders()
PropertySourcesPropertyResolver.getPropertyAsRawString()

这里的this.PropertySources就是包含了最开始准备阶段的RandomValuePropertySource。有好几个PropertySource都去找值,找到值就返回。
这样我们整个流程就打通了。
总结
Spring的代码非常的庞大,代码水平也非常高,往往不是我们常规的思路,需要非常复杂的组织起代码来,我阅读整个代码的时候就是不停的debug,带着问题去找,这是我第一次去阅读它的代码,花的时间比较多,还有许多问题没有来的及看,比如spring.factories 是怎么去初始化那些接口的呢?等等问题。 万事开头难,走出第一步,我想后面再读会容易很多。
来源:https://www.cnblogs.com/dk168/p/16990973.html
本站部分图文来源于网络,如有侵权请联系删除。